As an affiliate of Skimlinks programs, I may earn commission by purchases made through links on this website, at no cost to you. Please see disclaimer, privacy policy, and cookie terms in the link provided above.
Showing posts with label crafts. Show all posts

March 3, 2022

Coffeewastedmomma is growing!


 We are moving forward

Hi Y'all!
I can't believe it has been over a month since my last post! February just flew by. 
I've had so much going on around here. This crazy Ohio weather really has had our whole family in a lazy, cuddly, chill mood lately. We finally got about 4 days above 45F, and it was amazing!
We've still been keeping pretty busy. Hubs picked up some OT, Ele and I have started our seeds indoors, softball has started, and of course I've been reading and crocheting daily.
I definitely will have book reviews posted soon, but today I wanted to share my newest accomplishment!

I have finally taken the plunge and opened an online shop, exclusively for CoffeeWastedMomma crochet!
I found this amazing company, Goimagine
The company has so many wonderful reasons to join. Their site is 100% handmade, not mass-produced, knock off, discounted merchandise. They have everything from jewelry, crochet, woodworking, to ceramic art. Each seller/crafter gets their own shop. A place to showcase their talents and expand.
Also, this company is 100% based in the USA. All sellers and buyers. 
My favorite part about Goimagine is that 100% of their profits go to charity. Specifically, to children's charities. Currently, they give to Horizons for Homeless Children, and to Relief Nursery
All transaction and membership fees go to these charities.
How amazing is that?
They do have several tiered plans to join and are absolutely worth it. 
Without name bashing, I'll just say, they definitely outrank competitors in so many ways!
This is a company I can see myself growing with. I am sharing two links.
1. Is to my personal shopfront:
2. Is to my shop from Goimagine's home page:

My shop is growing every day, as I navigate the site. There are also Facebook groups to join that have been amazingly helpful!
It's time for me to go make more inventory! I hope you'll check out my shop, but also, to any crafters; seriously, check out this company. If anyone has or is using, Goimagine, I'd love to hear your thoughts and experience.
Thank you to everyone that has stuck with me through it all. 
Have a blessed day!



December 18, 2021

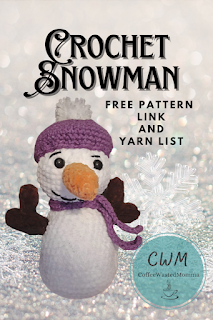
Crocheting for Christmas and getting caught up. Crochet Snowman Pattern

Christmas Crochet


 Hi Y'all! Wow! How are we so close to the end of this year?!?!

This whole year has flown by. I stay pretty busy throughout the year, so I always feel so rushed towards the end. There is always something I never got around to, or kept putting off for later, thinking that I'd have more time.

You'd think I would realize by now, that isn't going to happen. My 2022 goal is to not overload myself. I want to set realistic goals, work on my time management, and seriously get more organized!

Every year I have this list of projects, whether homeschool, craft, reading, or blogging. I know that they need to be prepared and completed WAY before they are actually useful. (e.g. Christmas things should be finished by Halloween and published)

I know this and I try, but seriously get behind every time. 

This particular crochet post has been in the making for quite some time! The two main reasons I am just posting it late December are, 1. My computer is an old piece of fruitcake! And 2. I am no photographer.

Top of my list is a new desktop. I know, laptops. That just isn't for me. The photos, well I'm learning about light boxes and angles. I'm improving.

On to the crochet...

There are patterns that I absolutely follow to a T. Then there are patterns I play around with and tweak to my liking. Lastly, sometimes, I can just come across a picture of crochet and figure it out blindly, no pattern. I just go with shapes and piecing it together.

The pattern I used for this snowman came from Amigurumiforum.com They have a ton of patterns. I believe, both free and paid.
Honestly, I did pretty much follow this pattern, with the exception I wanted to see it a bit larger, so I went up to an I hook. Although, next time, for the nose and arms, I recommend no bigger than a G
(mine was done accidentally. Just forgot to go down a hook size)


One of my favorite things about anything that I crochet is being able to choose colors, and customize them the way I want them. This one was super fun. I let my daughters decide the colors for the hats, and scarfs(I altered the "snood"). These are so soft and snuggable.
My new obsession with yarn is the super soft "baby" yarn.
Here are the yarns I used for my snowmen.
in white(body), chocolate(arms), and, tangerine(nose)
This yarn is AMAZING!
in red and purple
I definitely will be making more of these! I hope you enjoy them as much as we have. Not only that, but I'd love to see pictures if anyone tries this pattern.
Be sure to go see Nataly Dastous and give her credit for the pattern.
She has some great patterns posted.
Happy Crocheting and Happy Holidays!

January 7, 2021

Crochet Gnome Free Pattern Link

 Hey y'all!

I am so excited for 2021!
Amen! We made it!
How are you starting your year off? 

Catching up on unfinished projects?
Piling up your Pinterest with new patterns to try? 
Starting off on that one project you've been holding out starting?

I sort of fall into all 3 of these.

There are just way too many patterns, projects, and Pinterest ideas!

I cannot decide where to begin!

I worked all through December working on these Oh, too cute Gnomes!
Seriously!
They were definitely my biggest seller this year!
I decided to put my own spin on this project and up the basic pattern.
I have been making "Seasonal Gnome" hats.
A hat for each holiday, we'll say.
That way when you purchase a Gnomie, you can also add a variety of fun hats and keep him around all year!
I call mine, Gnomie in the Home!~AKA~ Jingles
Here is a quick link to the original, basic pattern that I started out with.

Here are a few that I have been working on. 
Yes, I custom made a Steelers...*gasp* Gnome!
It was a customer request! Thank Goodness their logo is pretty basic!


I also get almost all of my yarn from ordering online at Yarnspirations

I hope you enjoy this post and always comment. I'd love to hear from you!
Happy Crocheting. Check back for new hats to come!
I will be getting started on Spring soon!
I cannot wait!


July 27, 2020

Crochet Summer Tank Top

Crochet Summer Tank Top
(pattern link included)

Hey Y'all!

I hope everyone is enjoying their summer! As much as we can with COVID19 hovering over!
I'm not going to elaborate ANY on that subject. Let's just say, it was acknowledged and move on. Besides, this is a crochet post, right?
Right!

So, who is ready for this super fun and easy project?
That is totally wearable!

I actually made this one a few months ago.
I just seemed to be busy doing the usual 1,000 other things and this post got pushed aside.
No worries.
Thanks to me visiting, revisiting, and re revisiting...(you get it), my amazing Pinterest board full of ideas and patterns I spotted this one and decided to get it posted!

Breann over @Hooked on Homemade Happiness has a ton of amazing crochet projects.
Great patterns and easy instructions.
All creds go to her!


I loved this pattern, but I wanted to do my own colors.
I decided not to label this post "Ombre" tank because:
1. Breann already claimed that
2. I didn't follow her color pattern

I think it still turned out pretty well and I love it.!
She has written out an easy to follow pattern in sizes S, M, and L
I used the size small pattern.
I am 5'0" and 115lbs.

Don't forget to jump over and let Breann know if you use this pattern.
I hope you enjoy!
Happy Crocheting!


March 12, 2020

Crochet Pretty in Pinks Cardigan

Crochet Child Cardigan

Hi Y'all!

This post is long coming. I have been so excited to learn and branch out with my crocheting abilities. Every new pattern is such an accomplishment!
I love that with crochet the possibilities truly are endless!
Every day is a new search and every project is a new achievement.


This pattern has been sitting in my file for some time and I honestly was a little intimidated to start it.
I kept going back over it. Rereading through it. Double checking the stitches, etc. I really had to work up the courage to follow through. My six year old daughter is a great motivator!
She just kept asking..."Mom, when are you going to make my sweater"?
(Patience my small one.)


The pattern is free from:
The Mini Me Cardigan

She has done an amazing job writing this pattern out for even us...non professional crocheters!
Kudos to Courtney!


For mine, I used Bernat Pop in "Lipstick on My Collar" yarn

I am so excited about how this turned out!
My little has decided to call hers,
Pretty in Pinks. So, for this blog and my personal sweater only, that is the name.
I hope you enjoy this as much as we do.
The pattern really is simple. I should have made this long ago!
I used the pattern for size 6/8.
That way she will get to grow into her sweater.

Enjoy and Happy Crocheting!


February 24, 2020

Crocheted Reusable Swiffer Covers

Hey Y'all.
I wanted to get this post written and posted a month ago!
I have been super busy crocheting like crazy! Yes! Production!
Always a good thing!

I won't go into too much here. I wanted to focus this post on the incredible...
Crocheted.
Reusable.
Machine Washable!(I have used and washed mine 6 times already)
Amazing Swiffer Covers.
I have also seen them called "Swoofers" "Sweepers" and "Swifter" so how ever you search or choose to refer to them...THEY ARE AMAZING!


 Check out these before and after pics!


Here is the link to the fastest, and easiest pattern I have found:
Ravelry: Swoofer Pattern
There are several if you surf around the internet, but I like to live the "fast, simple, functional" life!
Be sure to share and link back.
I would love to see our pattern, product...and definitely before and after pics!
They really do work great!


January 16, 2020

Crochet Fabulous-ness!

Hey Y'all! I know I haven't been on here for-EVA!

Lots of life been happening.
I wanted to do a quick post to get back into the swing of things and get this running...again.

So, here is a few projects I have been doing and working on!
I love getting new ideas and inspirations!
Pinterest and Ravelry are 2 of my favorite places to find great new patterns.
Almost all of my yarn is purchased at either Walmart.com or Yarnspirations.com


I have enjoyed making all these things and so much more! Please comment and share. Always follow and invite friends. Please feel free to post pics of your own, send me ideas and make sure to tag
MY FACEBOOK PAGE
Thank you to everyone for supporting me and what I love doing! It is truly appreciated!

September 14, 2018

Halloween Craft For Kids-Funky Pumpkins/Jack-O-Lanterns


Funky Halloween Pumpkin Craft

As many of my fellow blogging mommas know, in order to actually have an awesome seasonal or holiday post out and floating around the internet in time for people to find it, view it, and make it useful; we have to get a head start and be planning WAY early!
Well, that is the plan...
I had been jumping around Pinterest, the web, and other blogs, trying to find a few great craft ideas for Halloween.
I have found several, but finding the time and getting my little actually interested in wanting to do them is another story.
We did manage to find one that she was pretty excited to get started on.
It was the using scissors part!
 I'm not sure if I should be proud that she does so well and wants to practice, or terrified that my new five year old has a scissor obsession?!?!

Anyway, the craft is a simple cut, decorate, and glue project aimed for toddlers and younger kids.
You can find the original post and give a shout out here to:


Funky Pumpkins
materials
  • construction paper
  • stick or bottle glue
  • scissors
  • old magazines or newspapers
optional decorations
  • googly eyes
  • beads
  • pipe cleaners

You will need to take your construction paper and cut out "pumpkin"(orange) shapes and the stems(green), then glue stems to back of pumpkins
I worked on this part while she cut out eyes, noses, and mouths from magazines.
This seemed to keep her busy and also reduce her glue use. LOL

Once everything is cut out, we decided to see how silly we could make them. The point was to not "match" eyes, nose, and mouth that typically looked normal. The funkier the better...and cuter.

After you allow them to dry, you can glue to a solid sheet of construction paper or use them individually however you like.
A fun idea is to use them as cards for friends. Write a spooky message on the back and give them out.

Here are a few we made. They turned out so silly and the little really had fun deciding which eyes or nose to add to which pumpkin.
You can always use different colors or make your pumpkins into different shapes.


I hope you enjoyed our quick craft. Be sure to check out our other craft ideas
If you are looking for some spooky books for your littles, be sure to check out my post here
Enjoy and Happy Halloween! Be sure to share your ideas or post pics if you try our craft!

July 18, 2018

The Kindness Rocks Project~ Kid Edition


The Kindness Rocks Project
What is it anyway?

The mission is:
One message at just the right moment can change someone's entire day, outlook, life

It all started when Megan Murphy was walking along the beach looking for a sign. A message to help her decide what to do.
With a sharpie in her pocket, rocks all around her, and an idea, she decided to not wait for a message but instead...leave one. A message of kindness for someone to find.
You can find out more about the origins and her story over at the website.
THE KINDNESS ROCKS PROJECT

Our Kindness Rocks

The Kid Edition:
I really wanted to do this with all my kids and niece and nephew. We could all use a chance to be kind to others. I wanted to make this as kid-friendly as possible and still teach them the lesson I was aiming for.
My main approach was getting them to think of ways that each of them could be kind to someone.
The most popular answer was "I can share."
When you are age 3-7, that is a huge act of kindness!

Starting off I had already gathered and cleaned as many "good" rocks as I could find in our yard and garden.(Thankfully, when my husband roto-tilled, it turned up tons of rocks!) We used what we had and they were all different sizes and shapes.


I knew the kids would need some help and prompting to figure out what their "message" would be.
We talked a lot about ways we are kind and things that make us feel happy.
I love their answers. Everything from Spiderman to Mom's cooking.
They shared that they felt kind when we love each other and when they play with their friends.

We decided instead of just using words as a message, it was easier(and fun) to really let them paint and show what kindness and being happy means to them.
Sometimes it was a bright color, a pattern or a rainbow.
Some they made into food or a character they like. Some painted trees or nature.
I love how they are all so unique and personal.
Isn't that kind of the point? Shouldn't our Kindness rocks be personal?
I am so proud of them and how much they learned and shared.


Now we get to leave them all over. 
We have taken some to the lake and the park. Leaving them around a tree or by a shelter.
We have a whole coffee can full of our kindness rocks to leave around and share.

Here are some of ours we made


I hope you enjoy our
The Kindness Rocks Project~ Kid Edition
Be sure to check out the website and always
share your story.

July 6, 2018

DIY Kid Craft~ Kid Made Wind Chimes


What momma wouldn't love to wean down those piles, containers, buckets, bins, bags and drawers of leftover, saved up, and collected "craft supplies"?

I know for me, it is a daily task to keep all these treasures contained and...hidden from little eyes that think every button or googly eye is the best thing since sliced bread!
But, we do have those days that we can actually find a use, a purpose for some of our ever growing supplies.
I am totally not opposed to anything you can reuse, up-cycle and DIY!
We are a frugal family, so we use what we have.
Hint* This supply list I'm going to give you is completely just for suggestions. Use what you have and make it gorgeous!
Onto our craft...

Plastic Cup Wind Chime
For Kids

I will say this took a lot of my doing...My little is four years old and there are a few things she definitely couldn't have done by herself or unsupervised.

Supply list:
plastic cup(any size/color)
yarn, twine, thread
hole puncher
pipe cleaner(1 per wind chime)
beads(thicker thread needs bigger hole in beads)
needle(same as above, thicker yarn will need larger eye to thread)
embellishments-stickers, glitter glue, foam stickys, etc


Assembly:
First you will take your cup and puncture a hole into the bottom(small) for the pipe cleaner to go through. (Good luck mommas! PSA: the cup will collapse under pressure while you are puncturing!)
Twist an X with the pipe cleaner to join two ends. Insert into hole of cup.
This will be your handle or ring to hang your wind chime by.
It should look like this:
Next you will use your hole puncher to make 3 holes evenly spaced around the rim of cup.
Now lay the cup aside.
Cut your yarn/string the length you wish(we did 10, 12, and 14 inches) remember you'll need extra to tie both ends.
Tie one end off larger than your bead holes. a couple knots should do.
Start beading, leaving a couple inches to feed through punched holes and tie to your cup.
Make three of these. We did ours three different lengths.
After you have them all beaded, proceed to tie them to your wind chime through the holes in your cup.
Your wind chime is complete! Now you can always add any other decorations you'd like!


Aren't they just the cutest?!?!
I hope you enjoyed walking through our craft of the day!
What fun crafts have you tried?
Anyone know of a better, safer way or a tool I'm missing to get the hole into the bottom of the cup? LOL
That was the hardest part! Still fun though. Please share yours!
Be sure to check out all our other fun ideas we've been collecting over here: CoffeeWastedMomma's Crafty Stuff Collection


July 1, 2018

Super Easy Summer Craft For Kids~Paper Plate Fans

Summer Easy and Fun
Paper Plate Fans

I am dying in this heat!
Here in Ohio, the last three days have been above 90F.
I was not made for Winter...but this heat, no rain, no breeze is about to kill me.

I have this very persuasive four year old that is determined we are going to do a craft every day..Every. Single. Day. this week. OUTSIDE!
Yes, she is also very specific. 
So...an outdoor craft that is quick, easy, and...cheap!(saving up for my iced coffee!)


I jump over to my wonderful Pinterest board filled with tons of great ideas. Seriously, my biggest addiction next to my babies and coffee!

I found this craft...
By the way...She is awesome! Check out her stuff! I have been following her for awhile and she always has something new.

These are so cute and easy to make.
The supplies are things you probably already have on hand. Bonus!

Supply List:
paper plates

popsicle sticks or "crafting sticks"

Elmer's glue or glue gun and sticks

crayons, paint or markers

scissors(my brain is melting. I just had to google...how to spell scissors!)

optional:
stickers, googly eyes, stencils, foam stamps...


Directions:
Cut plates in half(2 fans)
Decorate, design and embellish your half plate
If using paint or anything glued, wait until dried.
Glue 2 popsicle sticks into a "V"(wider is better) for gripping your fan/handle
Then glue the other 2 ends to the back of your "fan"
(press firmly)
Allow to dry
Fan away!!
So, I survived the heat and we got them all finished. I think we made about 8 in total. I even got the middle daughter to join in!
They turned out super cute and...very useful!
Now...fan mommy!
I hope you give these a try and always check back for more fun, cheap, easy crafts!
We have great ideas!
Happy July!
Share your fun ideas!


June 24, 2018

20 Summer Writing Prompts for Kids


Hey, mommas!
Are you on Summer vacation? or stay-cation, as I am!
Are you like me?  Your kids are driving you crazy with all the long days of,..."We're soooo bored!!"?

I know we've all been there!
Whether you are a working momma or a stay at home momma...we know. 
Are the kids relentless with the days of doing nothing?
"I fed you!" 
"I gave you the TV!"
"Go outside, go play!"
"Have you cleaned....anything today?"

I also get to thinking, what have they been doing all summer?
So, when I really got into creative mom mode, I came up with this great idea of getting them to write!
I know rocket science, right?
Well, it may take some coaxing but if they are bored enough and you can get creative enough...it may work!
It never hurts for them to practice! Especially since there isn't much actual writing going on in public schools these days. Everything is done on Chrome books or computers.
So, I make them write. With an actual pencil and paper.
Creative writing, handwriting practice, and a enough "me" time to put on a fresh pot of coffee!

Sometimes our kids need a little creative jump start. So, I made up this great list of ideas for them.
I think most of these cover a pretty wide age group. My own daughters are quite spread out in age, so what may pique one's interest may not for another.

20
Summer writing prompts for kids

1. Your best/worst day                  11. Best gift
2. Favorite movie                          12. Favorite hobby
3.Favorite meal                             13. Best/worst school subject
4. Best accomplishment                14. Favorite time of day
5. Your wish list                            15. Favorite game/sport/activity
6. Top 3 movies or books              16. A time you were scared
7. Your role model                         17. If you had a super power
8. Best vacation                             18. A goal for the year
9. Best friend                                 19. Make up your own character
10. Favorite holiday                       20. Write your own recipe

I hope these give you some creative ideas.
Do you "make" your kids write during summer?
Do you have some more great prompts?

If you are looking for some more great summer activities for your kids check out The Crafting Chicks, 100 Summer Activities and chart
You can also check out my fun and crafty board over here: Fun Craft Ideas
Happy Summer y'all!


Update:
I have added 20 more great ideas to this list! Be sure to also check out:  20 MORE WRITING PROMPTS

November 8, 2017

WIP Wednesday Craft Fair and Crochet Pattern

Craft Fair and Crochet Pattern

I just participated in my very first craft fair this past Saturday.
Let me tell you, it was very exciting! My mom and I signed up together and shared a booth/table.
It was at a local church that my best friend happens to attend and work at. This was actually their first craft fair in over twenty years.
I have to say it was a huge success for them and a great experience for us. The atmosphere and friendly people made it such a great first experience. They are even talking about having it twice a year now. Once in the Spring and again next Autumn.
I learned a few tips from fellow crafters about set up, pricing and expectations. also, I've found some creative ways, over on Pinterest to improve my display table and make printable tags or labels.
I even made a little over $40! So, not too bad for my first show!


Crochet Pattern

Okay, I finally accomplished tried to complete an actual pattern. I mean all the way through...from start to finish!
I found an easy and awesome pattern over at Redheart.com.
The pattern is here for:
It is listed as a level 2 easy pattern and uses less than one skein of yarn.
I really wanted this to turn out so great and be exactly like the pattern.
And, well, it probably would have, or at least came close if I had done a little refresher course on my stitches.
Apparently, I made the entire(ginormous!) hat in DC instead of the called for HDC...ooops!
I had to laugh at myself!
So, it didn't turn out exactly like the pattern, but it did make a hat! So, I suppose it wasn't a total waste of yarn.
Lesson to learn:
Double check pattern/stitches and use the correct one!
Check out my other great patterns and crochet finds over here: Crochet patterns and ideas
Oh, and I haven't done the braided tails yet. I plan to add those but haven't chosen a color yet.
What color for guys? I'm assuming it will have to fit a larger head...so a man. LOL
Do men wear white hats?

What are you working on this week? Have you laughed at yourself lately?

October 13, 2017

DIY~ Halloween Graham Cracker Haunted House

Our Preschool "creepy" (completely edible) Haunted House

Are you a Momma looking for a fun, creative project to make with your littles?
Are you looking for something that isn't going to take up your whole day just getting it ready?
(I know the attention span of a four year old! If prep time is more than 10 minutes...She's out!)

Then, this project is for you...and your little!
I too love a good craft that we can make together. There are always so many "grown-up" projects going on everyday, it's nice to slow down and do something together with them.

I found this idea over on Pinterest, of course!
Her houses turned out much more appealing than ours but that's fine with me.
Sometimes it's the process not the end result.

Little E was totally into this project from the beginning and well,....so was I.
We made a few changes and made it our own. Which, I believe is the whole point in this. You can take the basics and make it anyway you'd like. Each one is different.

Our Haunted House!


What we used: 

Graham Crackers(any brand)
Chocolate frosting
Orange frosting(bottle type)
Variety of candies(we had Reese's pieces, sprinkles, and candy corns)
Base, board, or plate(something to build on)
Zip lock bag or piping bag

We started with parchment paper to cover our cardboard base. I had her help me hold the sides and I piped the chocolate frosting to get the walls to "stick". This does take the finesse of pressing hard enough, and long enough for it to grip but, not so hard that you crush and collapse your crackers! It is a trained skill. LOL
Once we got the four sides on, the roof just kind of sat on top. I did try to pipe some frosting along the eaves to get the effect of it being attached.
After that it was pretty much sprinkle, candy and frosting mayhem!
We had a blast and it was quite sweet! Literally!
Luckily, this entire project is completely EDIBLE! I know, I know! Bonus!


I love finding these cute, little, quick craft ideas! There are so many fun ways to spend time together and maybe even learn a new craft. I love learning new things and hope to teach my littles to love learning. Even, just making a graham cracker haunted house!
We hope you enjoy and will try to make your own "Haunted House"!
What is your favorite Halloween craft?

October 5, 2017

My Homemade Slime...FAIL! (How NOT to do it!)

The Slime Nightmare

Let me just begin by saying, I am not a scientist! I am however pretty confident in my creative, DIY, Pinterest, Momma skills...until now!

It started out great. Little E wanted to make "slime"(thanks to the annoying commercial/ads posted at the beginning of, every. single. Youtube. video!)
I began by doing a quick...Pinterest search of...
How to make homemade slime
Y'all, there are seriously 100s of recipes! With borax, without. Shampoo, dish soap, cornstarch, contact lens solution, Epsom salt, shaving cream, Elmer's glue, glitter, food coloring, liquid laundry detergent...it goes on and on!
Just look <<HERE>>

The biggest factors for me were: 
A) What is the safest for my four year old, and
B) which recipe do I have all the ingredients for.

We started out with the simplest one I found.

Slime with Cornstarch
1c water(heated but not boiling)
3to 4 drops of food coloring
(mix those together)
2cups cornstarch
(slowly add to water mixture)
slowly begin to "work" mixture with hands until cornstarch dissolves and mixture becomes..."slime"
Sounds pretty easy, right???
This has got to be in the top 10 of grossest, weirdest things I have ever put my hands into.
Seriously...I'm a Momma. I have kneaded bread, made meatloaf, touched poop, vomit, dirt and a few un-identifiable substances!
This was worse!
I have NO idea, WHAT we made!
It was not slime!
It kind of had the texture of chewed gum you'd find in your kid's pocket after the wash but before it has been heated and dried. Add in a little grit from the dirt and lint that is now wrapped up and became a part of it.


One more close up pic....

Now...On to recipe #2!
Or as I like to think...almost slime. 

Slime with Epsom salt and Glue
4Tsp Epsom salt
4Tsp warm water
(combine)
in a separate bowl
8Tbs Elmer's glue
food coloring(2 drops)
combine and add to Epsom salt mixture
Again, work mixture together with hands until "slime" is made

Now, This one started out great! We thought we had finally gotten it! Real slime!

We has all the ingredients.
We had done everything just like it said.
And the "slime" was actually starting to form and feel like slime!!
Although there seemed to be a ton of extra "blue water" that the glue just wouldn't soak up. No matter how much we dipped and tried to work it into our slime.

I let Little E give it a try...
She LOVED it....for about two minutes!
And then, I don't know if it was the air or just that we didn't get all that water absorbed but it started to harden.Like first into a putty texture, then a dry playdough...then just a big, dry, gritty blob...
Like the cotton candy that sits out and gets air!
Hard. as. a. rock.!!!
I have no clue what we are doing wrong!
Making slime cannot be this hard!
Have you ever tried either of these recipes?
What works best?
I'd love to know of one we can easily make that really...works!